Super simple apps for speaking practice

IMG_2505

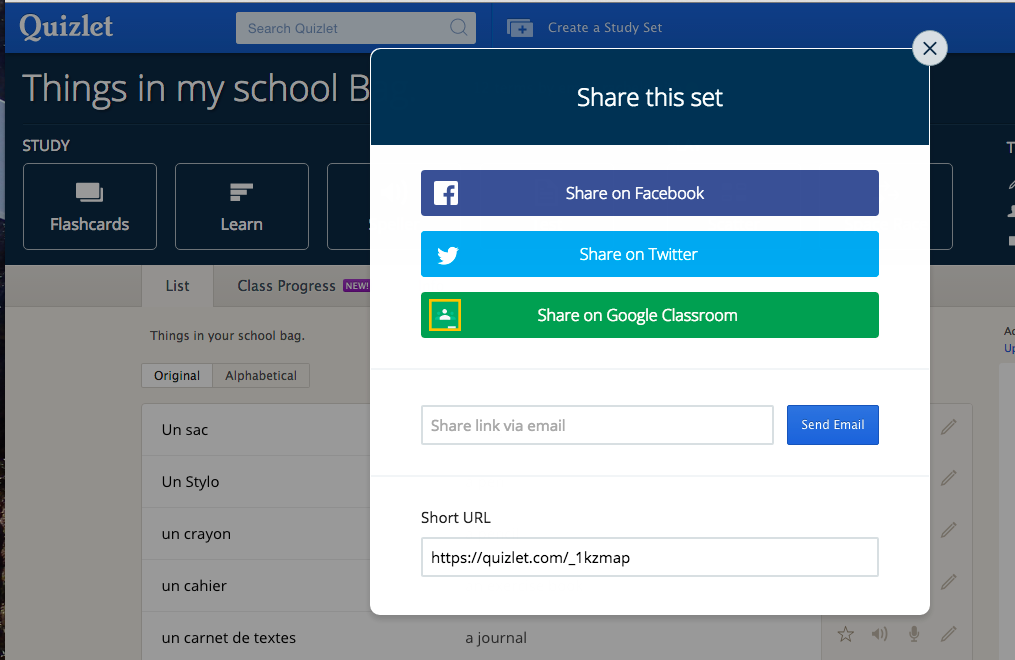
Using technology in your classroom does not need to be tricky.  The number 1 thing to get to grips with is a workflow.  If you use iOS devices look no further than iTunesU or the rather fabulous Showbie. If you operate in a mixed economy and are a GAFE school Google classroom is without doubt, the answer or failing that Google Drive.

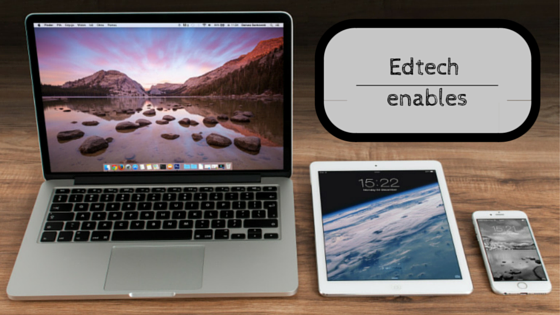
Tablets and iPad are the perfect companion to any MFL lesson. It’s like having your own personal language lab all squeezed into aluminium and glass. Many teachers find using tech overwhelming but it doesn’t need to be, there are many ways that tech can very simply enhance the work of the MFL teacher and his/her students.

Speaking is a big deal in MFL, we ask our students to do a lot of it although some of them positively hate it or are embarrassed to engage.  Moreover, it’s difficult, as the teacher, to get round every student and hear then speak in the foreign language in one lesson.  Tech can help you overcome all of these difficulties.  There are many recording apps out there that are simple to use and can slot perfectly into a lesson without taking up lots of time.  A large number of these apps allow students to ‘hide’ behind the technology or make new personas for themselves thus resulting in confident speaking performances rather than the whispers that you might get from them in whole class speaking tasks.

Here are a few of my favourites:

VR pro Voice record pro

is a simple recording app which integrates with Google Drive and drop box plus many others.  You can easily trim your recordings within the app should you need to.  I use this app to record all my GCSE exam speaking tasks.  It’s a super stable app and very easy for both a teacher and students to use and thanks to Drive integration easy to share too.

Yakit icon Yakit kids

I have written about this app before and it’s a firm favourite with my students plus it’s quick and easy to use.  Using this app students can make inanimate objects talk or even make photos of their favourite teen idols speak!  The great thing about this app is that two objects can be animated on the screen at one time which allows students to create paired speaking tasks.  The resultant videos can be saved to camera roll and uploaded to your chosen workflow system.

MSQRD_Icon MSQRD

This is a relative newcomer.  It enables students to put filters over their faces in order to ‘become’ someone different just like the filters in Snapchat.  Some of the filters can be a bit scary so check out this app before using with younger students.  The app allows you to record short videos and download them to your camera roll.  It’s a very straightforward app to use and will definitely encourage some of your more reluctant speakers to speak.

Voices-icon Adobe Voice

I love the super simple interface of Adobe Voice however,   In order to use this app you need to sign in.  I have created my own account and all students sign in on this account, this is how Adobe recommend you manage the use of the app.  Adobe voice allows students to tell stories using simple icons (from the noun project) and voice recording.  My students can create a recording in 5-10 mins and upload it to our Google Classroom no fuss, no faff!

bookcreator-iconBookcreator

My favourite of favourite apps.  Incredibly simple to use.  You can make beautiful text books or the students can show their learning in book format.  You can combine books to make a whole class book and you can use this app together with other apps to make incredible interactive books.  At its most simple, this app allows students to make books or single pages using photos, videos text or voice. These can be downloaded in epub, pdf or video format ready for sharing.  Please note that if shared in pdf format the interactive elements will not work thus defeating the object of your speaking task!
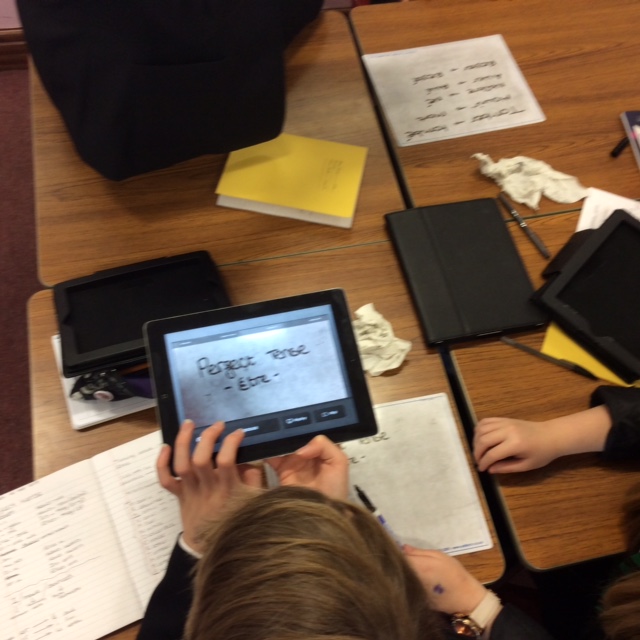
Explain_Everything_Interactive_Whiteboard_Icon-1024 Last but by no means least is the app to end all apps Explain Everything.  There is nothing you can’t do with this app.  Sadly it’s iOS only.  I use this app in class for many, many things but in terms of speaking activities students use it to create simple animations or even simpler still they can record their voice and write the key phrases on the screen in the target language.  I also use the app to demonstrate pronunciation I then share my video with my students so that they then have a record of how to pronounce some of the trickier words in French.  The app also allows me to highlight the silent letters and point out French diphthongs and triphthongs.  All resultant videos can be saved to camera roll or directly into Google Drive, Drop Box, You Tube and many more. The sky is your limit with this app!

All of the aforementioned apps have been tried and tested with a variety of students in my classroom.  They work well and enable the student to focus on the learning not the technology.  Of course none of the above will work well if you have not considered why you are going to use them in your lesson.  Pedagogy first, technology second; ALWAYS.

Edtech enables

Edtech

It was half term so, a battering for edtech from those who have never used it in their classrooms was well overdue. 

I can only speak from experience as an MFL teacher but I have some questions for the detractors…

Can you listen to every child in your classroom speak in the foreign language every lesson and have a clear understanding of how good their accent is? I can.

Can you easily correct the pronunciation of each child giving them audio materials of how they can improve & give them exercises to support? I can.

Can your students listen to authentic French materials and have control of when to pause and rewind the dialogue so that they can try to understand it more clearly? Mine can.

Can you set work in any of the 4 skill areas and watch as the students’ results arrive thus giving you instant feedback and allowing you to change your teaching there and then to support their needs? I can.

Can your SEND students easily express their thoughts and ideas without having to actually type or write thereby giving you a very, very clear idea of what they are actually capable of because the thing that holds them back has been removed?  My students can.

Can you keep a constant flow of work available for students who are off with a long term illness thus making their return to school that much easier? I can.

How long’s your feedback loop?  I guess a week at best.  Mine’s usually 3 days but it could be a matter of hours.

Can you create text books specific to your student’s needs? I can.

Can you share your student’s work with the whole world?  I can.

Can you mark your students’ work from anywhere in the world?  Provide feedback and also view the responses from students?  I can.

Technology in my classroom facilitates learning within the 4 walls of that room and out with them.  It is not the be all and end all, it is a tool which I decide when to deploy to best effect.

As an aside, I am an ADE but I don’t get paid by Apple and I was using technology to support the students in my class long before I became an ADE.  I regularly look at other forms of technology which I think will be useful in class but for the moment, in my opinion, iPad is the best on the market for use in education and yet there are elements of the Apple ecosystem that I really don’t like.  I work in a GAFE establishment (Google apps for education) this suite of apps is fabulous and I readily recommend its use to anyone. I am not a Google Certified Educator.

Using iOS accessibility features in the MFL classroom

IMG_1341The iPad is an amazing tool however, some of the native apps and features are often overlooked as we all head to the app store to download the latest must have app.

The iOS accessibility features are incredible and they are of course designed to enable those with disabilities the chance to enjoy all the fun and function of an iPad/iPhone.  As teachers and especially as linguists we can tap into some of these features and use them to increase independence and confidence with our foreign language learners.

Speech function.

The speech function, when enabled will read out selected text for the user.  Good news for linguists – it will do this in any number of languages!

Here’s a quick video showing you how to enable the speech function

NB. if students are listening to a text from a Google doc.  The document must be in edit mode for speak selection to work.  A doc is in edit mode when you tap the blue pencil in the bottom left hand corner of your screen!

Ideas for use of speech selection in class

  • Rather than using a keynote or power point presentation students can use speak selection to introduce them to new vocabulary
  • if students are unsure how to pronounce something speak selection can be used to help them. Great for if you, the teacher, is busy or if they are working at home.
  • Students can also slow the speech rate down in order to fully comprehend how a word or sentence is pronounced.  Be warned if they slow the rate down too much it can have a detrimental effect.
  • Students can listen to a text as it is read out to them. Great for improving the link between the written and the spoken word especially in languages like French with so many silent letters!


Another great iOS accessibility function is the speech to text function.

On the keyboard you will see a microphone symbol.  When you tap on this you can simply speak into your iPad and it will convert your speech to text.  If you want the iPad to type in French please ensure that the French keyboard is enabled.

IMG_5010


Ideas for using speech to text in class

  • Great for practicing pronunciation.  Is the text on the screen showing what the student has said into the microphone? Students can then repeat the phrase until the iPad correctly types it. Try it yourself with a really anglicised French/Spanish/German accent and you’ll see what I mean!
  • Checking for mistakes.  An iPad is a computer and is no substitute for the human brain.  Once students have spoken the word or phrases get them to check the text over and correct it if required!

These are just a few ideas. Let me know if you think of any more.


10 ways to use photography in your classroom

IMG_4951In my previous post I talked about how I had been experimenting with iPhone photography.  iPads and mobile devices are becoming more and more prevalent in classrooms and they come equipped with a whole host of great features, the greatest of which is the camera.  The camera is brilliant and in most classrooms is used for recording films.  Photographs are used in classrooms but more often than not students tend to select photos from creative commons sites such as pixabay or foter.  If a student is wholly engaged with a project or task they are more like to remember it, so maybe it’s time to stop students searching for photos and let them get creative and take their own.

  1. There are a multitude of apps that allow you to add words to your photos such as wordswag, adobe post and typorama to name but a few.  Why not get your lesson started with a quote, fact or provocative statement using a photo to support it? Better still, get your students to create them.IMG_4945
  2. Photograph a process.  This could be a science experiment or a design and technology project or even the creation of a piece of art.  Students could then drop their photos into the app Paper 53 and annotate on them or type below them. In Paper 53 you can highlight elements of your photos to make them stand out more.IMG_4944
  3. Collaborate on an iBook.  You could ask your form group to document a day in the life of your school.  Students could then collate their photos in an iBook which could then be shared at open evenings and the like. Take a look at Louise and Lisa’s One Best Thing iBook  to get some ideas!
  4. Take a photo. Paint it. Or add filters to your original photo to get inspiration for painting.
  5. Take a photo or a series of photos and use them as inspiration for writing.  Students could even take photos as inspiration for others.
  6. Document a school trip.  Rather than the somewhat uninspiring photos that we all come back with from school trips, challenge your students to get creative and take some inspiring photos.  The photos could then be used to make a slide show using Haiku deck app.  The beauty of Haiku deck is that it doesn’t allow too many words so the photos get to shine!Screen Shot 2015-12-27 at 16.05.10
  7. Describe your community.  Get out of the classroom and get taking photographs of the people and places within it.  Back in the classroom students could create interactive books using their photos and the app book creator.  I am definitely doing this with my languages classes when we learn about places in town.IMG_4948
  8. Portraits.  This would work well on a new intake day or with a new Y7 class.  Take portraits of each other and then interview the student.  You could link the photo to the interview using a QR code or you could video the interview and link to the photo using augmented reality.
  9. Create a photo story.  Using the comic life app or bookcreator app IMG_4949
  10. Turn your students into sports photo journalists and get them to document a school sporting event.  Publish the best photos with a match report in the school newspaper or the school blog. Look at Bill Frakes’ photos for inspiration.


Creative fun with iPhone photography

‘Creativity is intelligence having fun!’ Albert Einstein

I love to bring creativity to my classroom.  I enjoy thinking up creative activities for my students to engage in.  Take a look at my blog posts on Sketchnoting, stop motion, murderous learning or my iBooks on creativity in the classroom and Henri Rousseau.

To my mind, creativity brings a new dimension to learning, it adds fun and enjoyment to a classroom setting as well as engaging both halves of the brain.

Knowledge has limits – creativity doesn’t.  It’s our job to take learning beyond it’s limits.

Throughout the past 6 months I have been experimenting with iPhone photography. 

During the 2015 ADE institute in Amsterdam I was hugely privileged to be able to listen to the photographer Bill Frakes talk about his life in photography. His project Nebraska skies is mind blowing whereas his emotional video about a singing festival in Estonia made me cry.  I came away from the session with 2 things ringing in my head that Bill had said; 1 – look for the light 2 – always take the shot because you can’t go back. Armed with this information I decided to investigate to what effect the iPhone camera can be used.

The easiest way to learn how to use the camera in your phone or iPad is to simply have a go.  The native camera app on the iPhone has a set of filters that you can try, you can also adjust the light, the colour or black and white as well as crop your photos.

If you love filters, there are oodles and oodles of apps out there to play with.  However, I would say keep it simple.  My favourite apps are Snapseed (free) Hipstamatic (free but with in app purchases) and Enlight (£2.99)

The above photos were taken using the Hipstamatic app.  This app allows you to choose between a variety of lenses and films to create different effects. You can get some lovely vintage looking photos using this app.

The photo on left was edited using the Snapseed app.  In this photo I have applied the drama filter. The photo on the right is the original unfiltered version.

FullSizeRender (10)

The native photo app has some in-built filters to play with.  In the above photo I have applied the fade filter.

You can also edit you photos by cropping them.  I like this silhouette of my husband and sun against the winter sky but in the first photo, there’s too much foreground. I much prefer the cropped version on the right.

Light and shade are important in photos.  I love how the light falls across my daughter’s face in the fist photo in the second and  fourth photos the shadows behind my son add depth to the photo, whereas in the third photo his face is in shade and his body not making him look even more like Batman

Framing the photo and drawing the eye are pretty tricky things to get right and I’m a long way off being good at it.  However, if you compare photo 1 to photos 2 and 3  you will understand what I mean.  The poor light and boring foreground in photo 1 do not help to draw the eye to the beauty of the manx coastline beyond.  In the forth photo the electric tram tracks help to draw the eye into the photo.

Things I’ve learnt:

  1. Light is really important even more so when using an iPhone simply because of the limitations of the camera.  Shadows can make great photos too!
  2. Always have a focal point but your focal point does not necessarily have to be in the middle of your photo.
  3. Tap on your screen and the camera will focus where you tap.
  4. Try not to use the zoom. On the iPhone it’s a digital zoom not an optical one so, zooming in distorts the quality of the image.  Instead try to get closer to your subject or crop your photo later.
  5. When it comes to filters – less is more.  I prefer the clarity of an unfiltered image.  That said, I used black and white quite a lot.
  6. Try to draw the viewers eye – frame your photos (I find this quite difficult)
  7. Experiment with the subject of your photo.  Portraits, animals, landscape, still life – try it all!
  8. Publish you photos – get feedback from a critical friend.  I post my favourites on Twitter and tag a few fellow iPhone photographers – thank you @deepexperience1 and  @oakes_dan
  9. Join Google Photos and get it to sync with your camera roll in this way you free up space on your phone and you never lose those precious photos!  What’s more you can create collections which is a great way of organising your shots.
  10. To begin with choose something to take photos of – it will help you to focus (no pun intended!) I started by taking photos in and around my village

Photography is like life – take the shot because you can’t go back.  Unlike life though, you can delete any photos you don’t like!

Happy snapping!  Please share your photos on Twitter I’d love to see them!

In my next blog post I shall look at some ideas of how to use photography in your classroom.

Stop all the clocks! Stop motion animation in the MFL classroom.

I’d heard of stop animation but I had never really understood how I could use it in the MFL classroom.  That was until I attended ADE institute in Amsterdam this summer….

I got lucky and by lucky, I mean really lucky.  My room mate for the week was the rather wonderful Catherine Jessey  @HPSMissJessey

Catherine is a Science teacher at Hove Park High and was tasked by Apple to present her work on her use of stop motion videos in the classroom at institute.  It would be fair to say that her presentation opened my eyes to what was possible with stop motion animation I was hooked.

I knew exactly how I would be able to utilise stop motion animation in the classroom because I felt it was the ideal tool for students to be able to show what they know.  Not only that, the tool is really easy to use. Catherine had already told me how quickly you could establish a student’s understanding of a topic by watching their animations.  I was sold on the idea.

My Y10 class began their GCSE course with the topic of holidays, this obviously necessitates the use of the perfect or past tense.  From my point of view the perfect tense is relatively easy but students always find it tricky.  I teach it as a 3 step or in the case of être verbs a 4 step process.  After a number of lessons learning I asked the students to show me what they had learned and to explain the formation of the perfect tense via the medium of stop motion animation.

Students had free reign over how they were going to use the app.  Most of them opted for whiteboards and pens – a digital meets analogue moment for sure!

imotion

In the iMotion app there are 2 settings.  By using the first setting the app automatically takes a photo every 3 seconds. The other option is manual, here the user takes a photo as and when they want to.  My students used the manual mode, as this enabled them to pause the app, wipe boards clean, move things around and then take the next picture.

IMG_4670 IMG_4664 IMG_4665 IMG_4666 IMG_4668

Take a look at one of my students videos

The results were brilliant. The students had to think carefully about how they would show me what they understood about the perfect tense.  The creative nature of the activity generated an awful lot of discussion about how to fulfil the task and as a result the students had to talk about how to form and use the perfect tense. From a teacher perspective simply by watching the animations I could see who had a good grasp of the concepts and where the gaps in their knowledge lay.

Students worked in pairs and uploaded their efforts to our Google Classroom.  I was amazed when it took me no more than 40 mins to mark and comment on a class’s worth of work.

My students made silent movies but if you wanted them to voice their movies they could drop them into iMovie or the Video shop app and add text and voice.

imovie video shop

Where next?  I would like to try using stop motion for students to demonstrate their speaking abilities and make short animations of dialogue using lego figures or similar.  The  Lego Movie stop motion app may be useful for this kind of activity.

Lego movie

I’ll keep you posted….

Huge thanks to Catherine Jessey for the inspiration.

Google Classroom perfect for the MFL classroom

Those of you that know me well know that I can’t be doing with faff. I like simple and sleek.

I find large piles of books a faff and am constantly looking for ways to make marking that bit simpler and quicker.  I also love all things digital. One of the issues with digital work is where do you put it once the students have completed it and how on earth do you mark it?

Last academic year I was using a variety of methods in an attempt to make my workflow super sleek and slim lined.  I was using a combination of iTunes U, Google Drive and our then learning management system called My Big Campus.  The very fact that I had 3 systems on the go hardly made the the work flow and it wasn’t what you’d call super sleek either.

Google Drive is brilliant and awesome for collaboration and sharing but setting up shared folders at the beginning of the year can be a faff especially for younger students.  iTunes U is fab but it only works on iOS devices and we aren’t a 1:1 school so some students couldn’t access materials at home.  My Big Campus was a bit clunky but worked across all platforms but the marking and feedback work flow was poor.

A real solution was required and it cames in the form of Google classroom – a free learning management system from Google, of course.  It comes in the form of an app or you can access it via the web. In order to be able to use Google Classroom you need to be a GAFE school, it’s relatively easy to sign up – ask your IT techs about it and obviously clear it with your SLT.

The beauty of Classroom is its simplicity.  As a teacher you create a virtual classroom online.  Students log onto classroom with their GAFE login and they enter a code which gives them access to your classroom.  When they sign up to your classroom a folder is created in their drive called classroom in here they can see all the classrooms that they are in.  If they open a class folder they will find all the work that they have done in that classroom plus any materials that you may have provided for them.  As a teacher, when you create a classroom you also get a file in Google Drive called classroom and in here you can see all the work that your students have done for you organised in individual folders.   The faff of sharing folders that you have in Google Drive is gone – hurrah!

In Classroom there are 3 basic things you can do;

  1. Create an annnouncement
  2. Create an assignment
  3. Ask a question

An an announcement is just that, something you want to tell your students. You can attach things to your announcements such as a video link.

Ask a question here you can pose a question for your students and get them to comment upon it – a great way of getting a discussion going.  Also a great way of extending your classroom beyond the physical four walls.

Create an assignment, use this when you want the students to ‘virtually’ hand something in to you. You can attach files to your assignment which can be edited or not by each student.  You can also ensure that all students get a copy the file by selecting the appropriate option.

Screen Shot 2015-10-18 at 11.29.41

Students open the work from classroom and when complete they simply click hand in.  Once they have done this they no longer have editing rights over that document, just like they wouldn’t have if they handed in an exercise book.

Screen Shot 2015-10-18 at 11.33.26

Students can also add files to assignments which is particularly useful in the MFL classroom as it is dead easy to upload audio and video files.  Students simply upload from Drive or directly from their desktop or directly from photos if working on an iPad – incredibly simple and super sleek.  No more confusion from students it’s just a few clicks and their work is handed in, not only that but their digital portfolio is instantly updated as the work is automatically put in their classroom folder – brilliant!

Screen Shot 2015-10-18 at 13.53.16

Marking is dead easy too.  Simply go to the student work tab of your classroom and you will see a student list on the left and all the students work on the right.  Classroom will also allow you to see those who haven’t done the work too.  To mark work click on a student’s name,  the work will now open in Drive.  You can now annotate the work by adding comments.  Once done close the work and you can add a private comment for the student, the student can easily reply and a dialogue about their work can begin.  When you have marked the work.  Click the check box next to the student’s name and click the return button.  The student now has editing rights over their work once more.  They can even make corrections and resubmit the work to you if that’s what you require.

Screen Shot 2015-10-18 at 11.39.45Screen Shot 2015-10-18 at 11.39.52

Screen Shot 2015-10-18 at 11.40.14

Screen Shot 2015-10-18 at 11.40.34

On final and rather cool thing about Classroom is that lots of websites and apps are now incorperating Classroom integration which means you can share things with you students even more easily.  For example in Quizlet you can create a vocabulary list and easily share on classroom by clicking the share in classroom button. Easy Peasy.

Screen Shot 2015-10-18 at 13.55.52

Google Classroom; super simple, slick and perfect for the Modern Foreign Languages classroom.

The guru of all things Google is Alice Keeler – follow her on twitter @alicekeller also check out her website alicekeeler.com

ADE 2015 or no man is an island – thank goodness!

Back in March I applied to become an Apple Distinguished Educator it was something that I had long wanted to do.  A few months later I was delighted to receive an email telling me that I had been selected, to say I was thrilled doesn’t quite cover it! 

As part of your new found ADE status you are invited to attend a week long ADE institute which this year took place in Amsterdam. This is my review of a truly awe inspiring week.

FullSizeRender 6

I live on the Isle of Man it’s a rock 35km by 12km in the middle of the Irish Sea it’s a beautiful place but believe me when I tell you that it can sometimes be wild and desolate too.  Island life can be… well, isolating. There are times when you feel well and truly cut off from everything.  One of the reasons I took to Twitter 3 years ago was to try and combat the sense of isolation in an education context.

The one thing that you learn on Twitter is that there are many of us who use technology in our classrooms to enhance teaching and learning but we are still in the minority and you can feel a bit like a one man band or as Stuart Hammersley @depipads puts it the “mad iPad man”  And yet when you step into your ADE institute the feelings of isolation and indeed madness fade away because literally every single person you meet is as passionate as you are about the use of technology in the classroom. It is incredible.

It has taken me ages to write this blog post largely because my head has been so full of ideas since institute, it has taken me weeks to process all that I learnt, in fact, I am still processing.  I went on holiday straight after institute and for the first week I swear I barely slept as idea after idea kept spinning round and round in my head. In the end I had to write a list on my iPhone in order that I could get some sleep!

Institute was a full on week of CPD.  I was captivated and inspired by the presentations of my fellow ADE’s leading me to sometimes wonder how on earth I had managed to become an ADE in the first place!  Bill Frakes’ session on photography was incredible his work on Estonia made me cry and his Nebraska skies film took my breath away! 

I have a long held, passionate dislike for text books and I already had it in my mind that I was going to make greater use of iBooks Author and produce my own iBooks in the coming academic year so sessions on how to create them and Alan Rosenfeld’s session on design really resonated with me. 

I really appreciated the chance to be able to talk things over with others who think like I do.  I have had a community project idea in my head for many years now but I have never really been able to get it off the ground.  Institute relit the glowing embers of this idea for me as one of the task set for us during the week was a community project.  As it happens I chose not to go down this route right now instead choosing to do produce a One Best Thing iBook, but following many, many discussions with Apple staff, fellow ADE’s and alumni and a great session on community projects I know that I will now get this project off the ground.

Institute helped me to define myself as an educator. What kind of teacher am I?  I concluded that I love being creative in the classroom and producing interesting lessons that will hopefully captivate my students and encourage them to have a love of language learning.  Lessons like – solving a murder, designing a new home for a victim of the Haitian earthquake, learning about adjectives and animals via the works of Henri Rousseau. I could go on and on.  What has also become clear is that Apple products will help me and my students to continue being creative and my fellow ADE’s will be the ones who push me to continually improve as a teacher.

My favourite thing about the week was the people.  They are passionate believers in purposeful use of technology in the classroom.  They are generous sharers of ideas.  They  are great listeners and advice givers. They are funny, kind, supportive and friendly and I am very, very proud to be one of them.

IMG_1152

Screen Time, Family Time, Play Time.

I was prompted to write this post after I took part in a Periscope conversation with a few others a couple of weeks ago.  Daniel Edwards (@syded06) had been out for a family meal and had been amazed or maybe even disappointed at the amount of very young children who were given a phone/iPad in a restaurant as entertainment and so as not to bother the adults. I have to agree this is concerning and a little disturbing. It is the modern day equivalent of the victorian being seen and not heard.

As a parent how do you decide how much screen time is enough? I don’t really have the answer to this and nor would I wish through this blog post to tell you how to parent your children, however it it is something that we, as parents, have to give close consideration to.

This is how things work in our family. I am not saying it’s the way I’m just saying that it’s a way.

When my children were very young we avoided giving them a screen because quite frankly, there was so much else in the world for them to discover. We placed a lot of emphasis on reading, cutting and sticking and playing outside all of which has stood us in good stead. By the age of 4 they probably played on the iPad for a very small amount of time and certainly not daily. Now that they are older 7 and 9 screen time is much more of an issue and it’s something we very much have to control.

Playing on the iPad has only really come to the fore in our family in the last 18 months or so, mainly since they both discovered Minecraft.  I have no problem with Minecraft as a game, it’s reasonably creative and as a result it’s not totally mind numbing however, I was concerned that it was becoming an obsession so something had to be done. Fortunately for me Richard Wells (@iPadWells) wrote this rather marvellous blog post on the topic of screen time and as we a result our family have followed his lead.

If it’s Sunny you play out

Chez Smith you are not allowed on your iPad before school – never, don’t even bother asking because the answer will always be no.

After school if it’s sunny you play out, afterall, it could rain tomorrow.

This is a really important rule for us. We live on the Isle of Man and there is nothing to do here and yet there is lots and lots to do.  There are 2 tiny cinemas miles away from where we live. There are a couple of soft play areas but again, on the other side of the island.  There are swimming pools in each of the major towns but that is it. However, what we do have are beaches right on our doorstep, streams to damn, trees to climb, dens to build, mates to play in the street with and added to all that we have freedom;  freedom that most parents in the UK would kill for.  I can let my children go an play out, with certain boundaries of course, and tell them to come home when the church bell strikes 7.  I don’t worry about them, they don’t need a phone so I can constantly text them to ensure their safety. We are indeed blessed and because of the uniqueness of this kind of childhood we, as parents, make sure our children experience it as often as they can. So, if it’s sunny you play out.

IMG_2872

When the children do play on their iPads I try to monitor what they are doing,  without constantly looking over their shoulder.  I prefer them to play in a family area rather than locked in their rooms (difficult at the moment because we are in the middle of major building works) also I adopt Richard Wells’ approach by directing them to other apps other than Minecraft or Minecraft videos on YouTube.  Our daughter finds maths tricky so we ensure that she does a stint on Doodle Maths everyday. She is also very creative so I have added apps such as Explain Everything, Paper 53 and iMovie to her iPad so that she can get making.  Both children have coding games on their iPads suitable for their age group. Most importantly I limit their time on the screen. I try for no more than an hour and yes, I do sometimes forget especially when it’s blowing a force 9 outside and the rain is bouncing down and peace has descended on our household, of course I do I’m only human!  The point I am trying to rather inelegantly make is that as parents we shouldn’t deny our children screen time rather we should show them what they can do on their iPads other than monotonous platform games or videos.

Family Time 

Now, back to that restaurant that Dan was in and all those kids on devices.  This I’m afraid, I cannot stand. Eating out as a family is, for us, special family time and I know that children can become agitated as they wait for the food to come but I don’t think screen time is the answer.  Capitalise as a family on this time.

When we go out to a restaurant I take what are known in our family as ‘the handbag games’  these are games that are quick and easy to play and also small enough to fit in Mummy’s handbag.  Our collection is currently Uno, Dobble, and Loco.  None of them take more than 15 mins to play, they keep the children occupied whilst waiting and we can have a lot of fun together as a family.   Moreover, they are teaching the children how to behave on a social occasion, how to play together, take turns and not be upset when you lose which you do. It makes the whole eating out experience so much nicer and family orientated.  Giving a child a device in this kind of family situation divides the family rather than bringing it together, in  my opinion.

handbag games

Screen time’s not bad it just needs to be carefully monitored.  Family time is important don’t t let it be dominated by devices and remember outside play is vital – so when the sun’s shining you play out!

Coping with Scoping: Things I’ve learnt about using Periscope

Periscope

Periscope is the all new live broadcast app from Twitter.  The app is still in it’s infancy but it has huge potential for use in education.  I’ve been having a little play and have made a few Scopes yes, really this is the official name for the live broadcasts that you make!

Before you start link Periscope to Twitter so that your Twitter followers get notifications of when you are scoping as well as your Periscope followers.

When you first start using Periscope it is a bit odd as you feel like you are talking to yourself so, I would recommend filming something that you are doing, in this way all you need to do is talk about the activity and your viewers don’t need to see you.  I began by talking about kayaking.  Save your Scope to your camera roll and watch it back, as a result you get used to the sound of your own voice and overcome some of the initial fear about broadcasting live!

When you are ready to do your very first piece to camera, there are few things that I would take into consideration.

1. Have a straight forward title, so that people don’t have to guess what you are going to talk about.  Add a hashtag too just like you would in Twitter.

2. Jot down some notes so you have a bit of an idea of what you are going to talk about, don’t script it, that takes away some of the beauty of the live broadcasts.

3. Prop your iPhone/iPad up against something or use a stand.  I use a book stand designed to prop recipe books up in the kitchen!

4. Don’t have your iPad too close to you and don’t have it at too steep an angle, your viewers don’t want to see up your nose.

5. You only get to see what you look like once you start broadcasting.   In order to check 1st go to your camera and turn it to face you it will give you an idea of what your viewers will see.  Check that the background is ok – no dirty washing on display! Check also what you are wearing.  Ladies that spaghetti strap vest might be lovely for lounging around in at home but on Periscope all people will see is flesh!

6. You are now ready to broadcast.  Double tap the screen to turn the camera on to you.

7. One of the beauties of Periscope is that you can interact with your viewers as they can post comments on your screen.  The comments disappear pretty quickly however, Periscope are going to bring out an ability to scroll through comments in the near future.  If you are scoping using an iPhone it can be hard to read the comments @syded06 asks his viewers to type in capitals so that he can easily read what is being said.  At the end of a broadcast it is possible to save to your camera roll.  However, comments do not save so you should make reference to the comment itself in the answer or even read the comment out so that when you watch the broadcast back it all makes sense!

8. Be yourself, this is one of the lovely things about Periscope, you get to meet the person behind the Twitter handle and as a result interactions in both forums can become more productive.

9. Keep your broadcasts reasonably short.

10. Save your broadcasts to camera roll, they are deleted from Periscope after 24hrs and the broadcasts you make can be a really useful reflection tool or you could post them to your blog!

Happy Scoping!